eduroam home Configuration for Cisco ACS 5.3
Add National Proxies as RADIUS Clients
- Go to “Network Resources > Network Devices and AAA Clients” and click ‘Create’
- In the ‘Name:’ field enter ‘roaming0.ja.net’
- Under ‘IP Address’ select the ‘Single IP Address’ button and enter in the field the IP Address of the NRPS ‘194.82.174.185’
- Under ‘Authentication Options’ tick the ‘RADIUS’ box
- In the ‘Shared Secret:’ field enter the shared secret for roaming0 for you RADIUS Server. This information can be obtained by visiting https://support.roaming.ja.net
- Click ‘Submit’
- Repeat the above steps for roaming1.ja.net and roaming2.ja.net

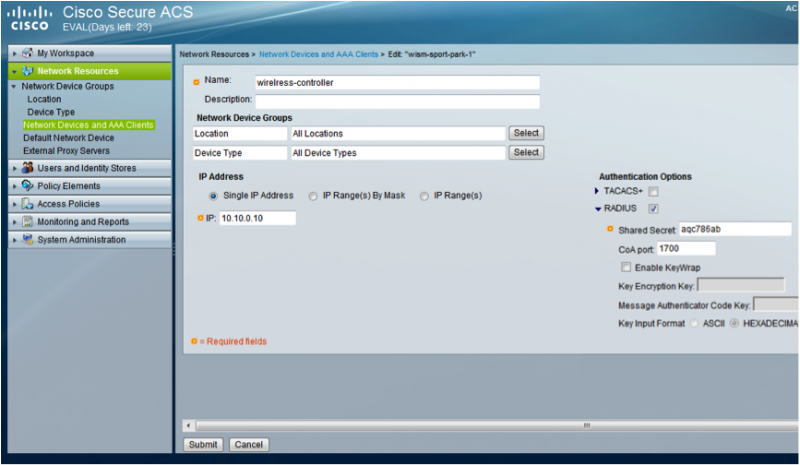
Add Local Wireless Infrastructure as RADIUS Clients
- Go to “Network Resources > Network Devices and AAA Clients” and click ‘Create’
- In the ‘Name:’ field, enter the name of the Network Access Server. In most cases this will be your wireless controller or access point e.g. ‘wireless-controller’
- Under ‘IP Address’ select the ‘Single IP Address’ button and enter in the field the IP Address of the Client e.g. ’10.10.0.10’ or alternative enter ranges or subnets for multiple RADIUS Clients
- Under ‘Authentication Options’ tick the ‘RADIUS’ box
- In the ‘Shared Secret:’ field, enter the shared secret for the RADIUS Client.
- Click ‘Submit’
- Repeat the above steps for all of your Network Access Servers.
Add Local Authentication Store
To authenticate your own users you will need to add an authentication store. The type and settings of authentication stores will vary from site to site. Please check the Cisco documentation for the exact details of how to configure ACS for the type of authentication store your site uses.
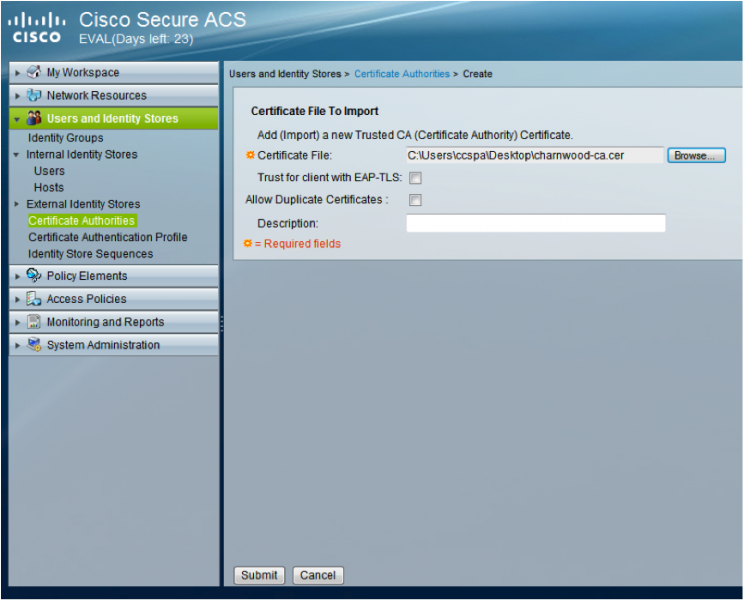
Add Local Certificate Authority and RADIUS Server Certificate
Add the certificate authority for the RADIUS server certificate to ACS.
- Go to “Users and Identity Stores > Certificate Authorities”
- Click ‘Browse…’ for the ‘Certificate File:’ field and select your RADIUS server certificate authority
- Click ‘Submit’
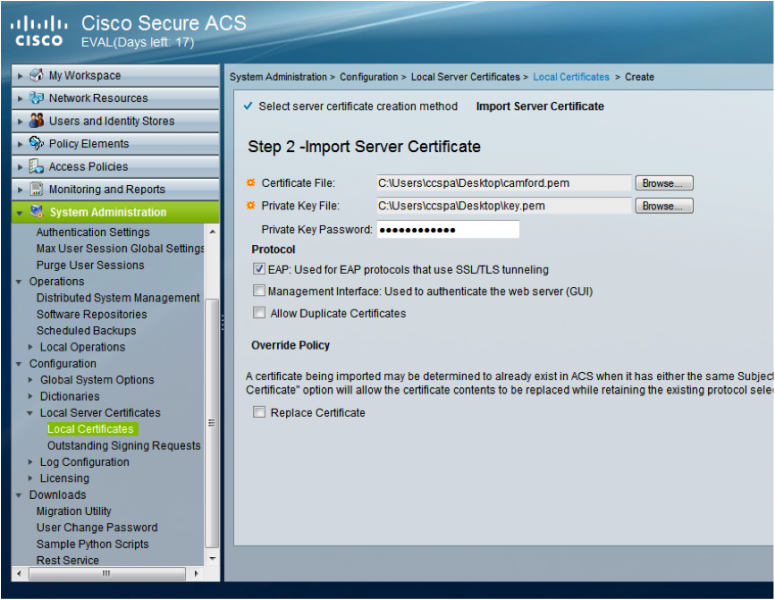
Add the certificate for the RADIUS Server
There are a number of ways of installing a certificate for the EAP authentication of clients on the ACS. Which method is used will depend upon the site. The following describes installing a certificate from a file.
- Go to “System Administration > Configuration à Local Server Certificates à Local Certificates” and Click ‘Add’
- Select the ‘Import Server Certificate’ radio button and click ‘Next’
- In the ‘Certificate File:’ field click ‘Browse…’ and select your certificate file
- In the ‘Private Key File:’ field click ‘Browse…’ and select your certificate key file
- If you key file is password protected, enter the password in the ‘Private Key Password:’ field.
- Under ‘Protocol’ tick the ‘EAP: Used for EAP protocols that user SSL/TLS tunneling’ box
- Click ‘Finish’

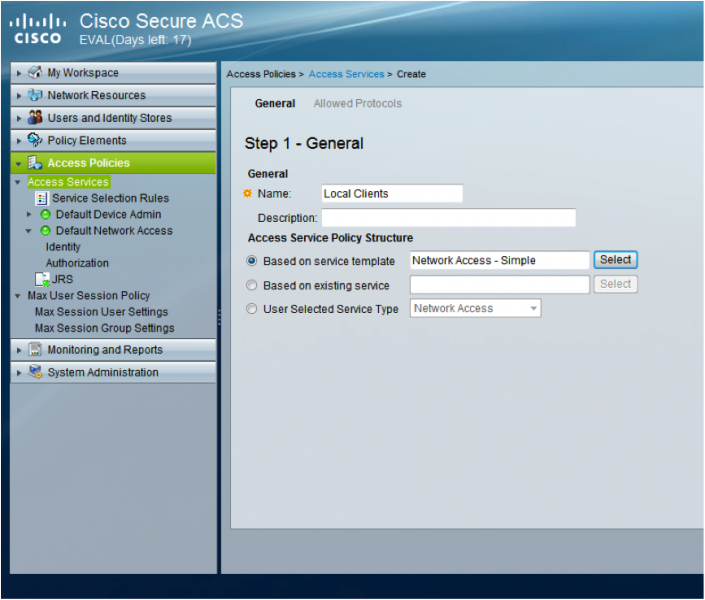
Create an Access Service for local users
- Go to “Access Policies > Access Services” and click ‘Create’
- In the ‘Name:’ field enter a name for the service e.g. ‘Local Clients’
- Under ‘Access Service Policy Structure’ tick the ‘Based on service template’ radio button and click ‘Select’
- Choose ‘Network Access – Simple’ and click ‘OK’
- Click ‘Next’ and the tick the boxes for the EAP Types you wish to support. E.g. ‘Allow PEAP’
- Click the drop down arrow for the EAP Type and select the inner authentication methods required. E.g. ‘Allow EAP-MS-CHAPv2’
- Click ‘Finish’

Create a Policy for Permitting local Access
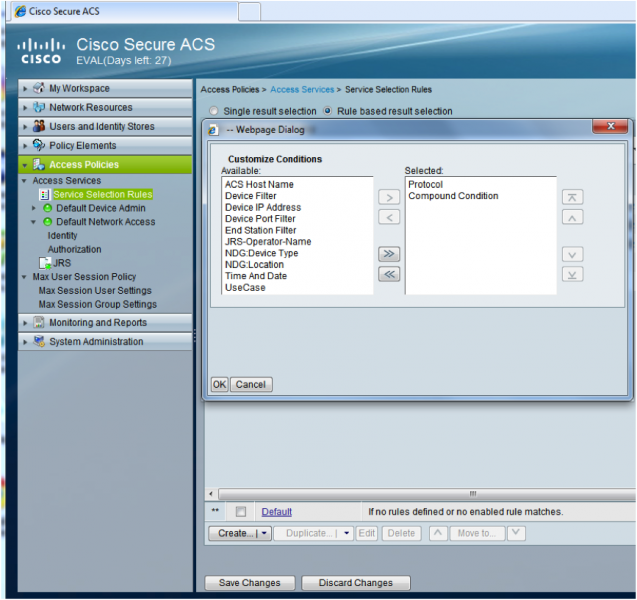
Add Compound Conditions to Service Selection Rules
If you haven’t implemented the Visited section, you will need to add ‘Compound Condition’ as an option in the ‘Service Selection Rules’
- Go to “Access Policies > Access Services > Service Selection Rules”, then click “Customize”
- From the “Available:” conditions add ‘Compound Condition’ to the “Selected:” list and click “OK”
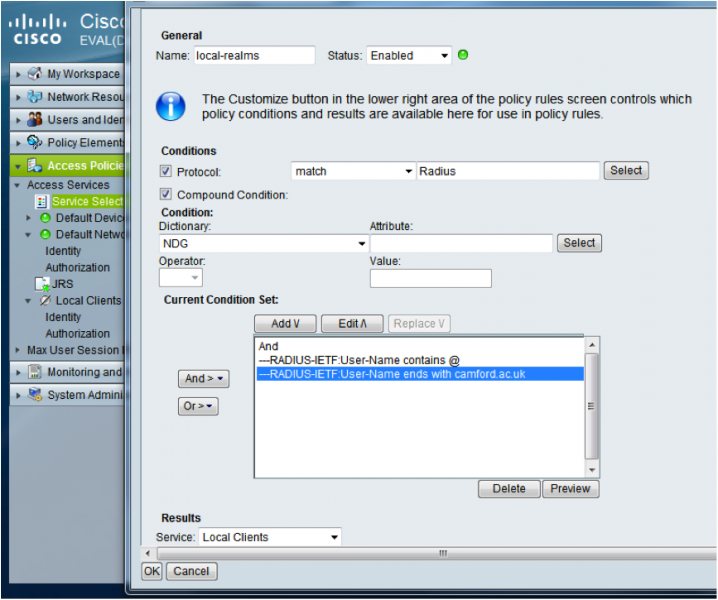
Create a Service Selection Rule for Local Users
- Go to “Access Policies > Access Services à Service Selection Rules”
- Tick the box next ‘1’ and then click the drop down box on ‘Create’ and select ‘Create Above’
- In the ‘Name:’ field enter ‘local-realms’
- Under “Conditions” tick “Protocols” and then match on RADIUS
- Under “Conditions” tick “Compound Condition”
- From the “Dictionary:” drop down select ‘RADIUS-IETF’ and then choose the “Attribute” ‘User-Name’
- Change “Operator:” to ‘contains’, “Value” to ‘static’ and enter @
- Click “Add V” and then click “And >”
- Change “Operator:” to ‘ends with’, “Value” to ‘static’ and enter your sites realm e.g. camford.ac.uk
- Click “Add V” and repeat the previous step for all of your sites domains
- Under “Results à Service:” choose the previously defined local Access Service e.g. “Local Clients”
- Click “OK”
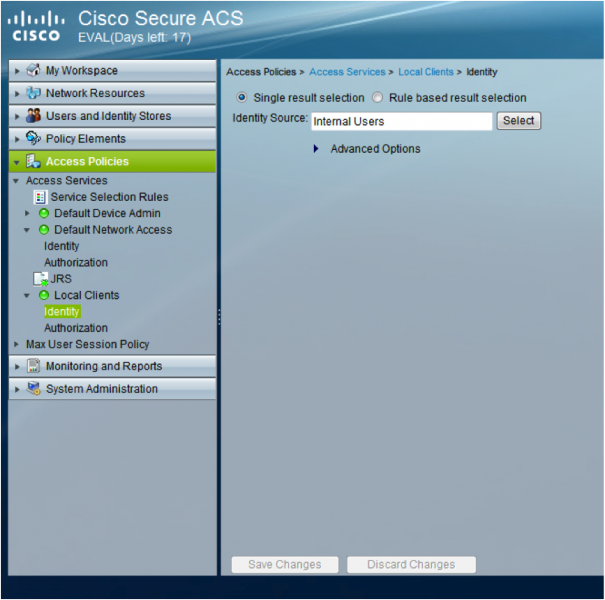
Choose an identity store for local users
After the policy has been created to divert local users to the correct Access Service, the Identity store needs to be defined for that service. To do this:
- Go to “Access Policies > Access Services à Local Clients à Identity” where ‘Local Clients’ is the name of the Access Service for local users (as defined above).
- Under ‘Identity Source:’ choose your sites identity store e.g. Active Directory Server.
- Click ‘Save Changes’