How to block or sinkhole domains in Windows Server 2008
How to block or sinkhole domains on Windows server 2008 DNS.
There may come a time when you may require to sinkhole or block a large number of domains.
One of the easiest way of doing this is within your BIND DNS infrastructure by making your DNS Resolvers authoritative for the domains that you wish to block.
However if you do not have a BIND DNS server then this guide will allow you to sinkhole domains within a windows server 2008 environment.
Microsoft's implementation of DNS is heavily centered around a GUI interface and is not natively designed to work with text files for mass import of domains, however there are some tweaks that we can make in order to do so.
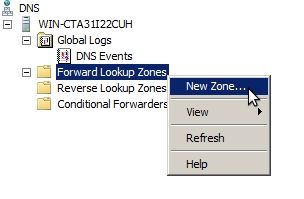
The first thing that we can do is create the default zone that all of our blocked domains are going to use. Within the MS DNS Manager utility right click Forward Lookup Zones and the select New Zone
.
When confronted with the New Zone Wizard select Next → Select Primary zone → Next
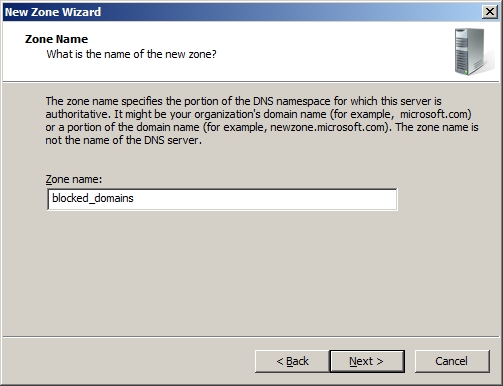
Now enter the name that you want to give this zone. And then accept the default filename of the specified Zone name.dns in this example it is blocked_domains.dns.
The next page in the wizard talks about dynamic updates.
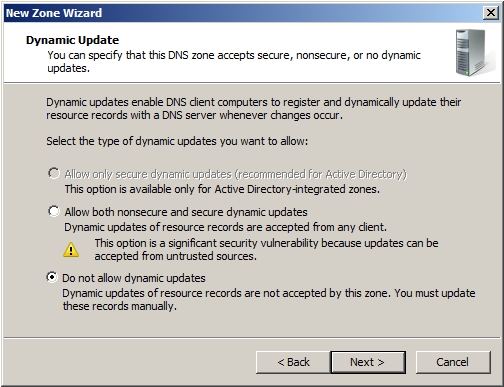
We do not want these being updated dynamically from clients in this case we use Do not allow dynamic updates, now just finish through the wizard.
You will now see the newly created zone of blocked_domains listed in your Forward Lookup Zones within the MS DNS Manager utility along with some initial configuration for the zone.
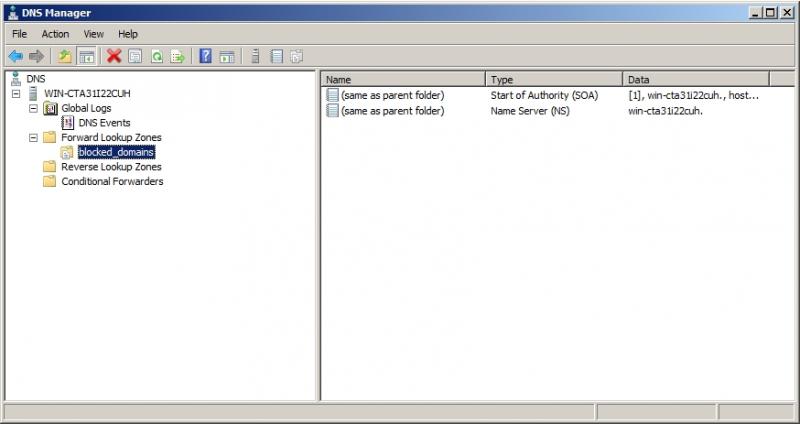
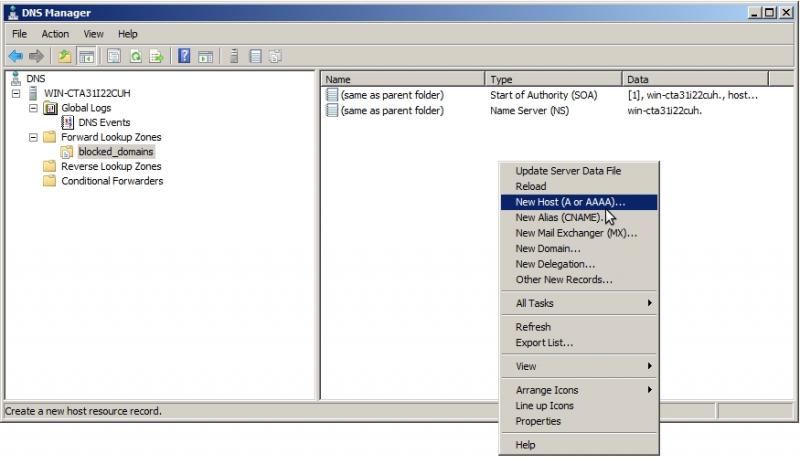
We now need to add the appropriate entries to this zone for the blacklisting of the domain and sub-domains of the blacklisted domain. As such we now add the wildcard A and AAAA records. Right click in the right pane under the blocked_domains container and select “New Host (A or AAAA)...”
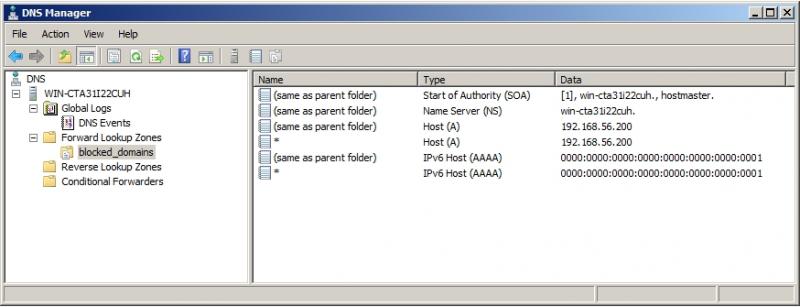
Now fill out the required information that is needed, in the example below we created both A and AAAA records. The A records are pointing to a sinkhole and the AAAA are pointing to local host.
Now that this has now been defined we can now specify that the DNS server loads its zone data from a file rather than from the registry on first load, this will enable us to operate bulk updates.
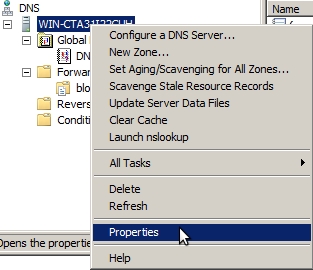
We now need to right click the DNS server and then select Properties and select the Advanced tab on the DNS server Properties Window.
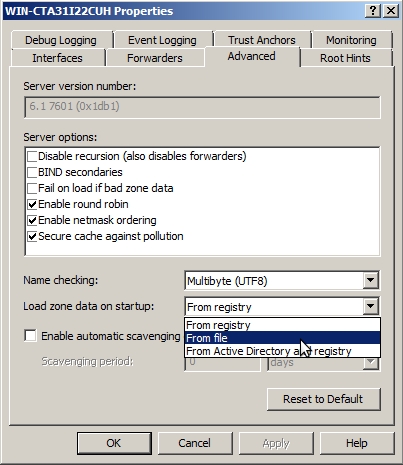
We now choose to Load zone data on startup: from file and then select apply.
Now if we check in %SystemRoot%\System32\DNS (normally C:\Windows\System32\dns) we will see a few files blocked_domains.dns and boot.
Blocked_domains.dns contains the configuration for the zone we recently configured, and as you can see looks very similar to a BIND zone file if you are familiar with them.
;; Database file blocked_domains.dns for blocked_domains zone.; Zone version: 5;@ IN SOA win-cta31i22cuh. hostmaster. ( 5 ; serial number 900 ; refresh 600 ; retry 86400 ; expire 3600 ) ; default TTL;; Zone NS records;@ NS win-cta31i22cuh.;; Zone records;@ A 192.168.56.200@ AAAA ::1* A 192.168.56.200 AAAA ::1;; Boot information written back by DNS server.;cache . cache.dnsprimary blocked_domains blocked_domains.dnsOnce we have added a few domains that we wish to block the boot file will look as follows.
;; Boot information written back by DNS server.;cache . cache.dnsprimary blocked_domains blocked_domains.dnsprimary blockeddomain.com blocked_domains.dnsprimary buymalwarehere.ru blocked_domains.dnsprimary s23a93884skf.net blocked_domains.dnsprimary almost-somedodgeybank.com blocked_domains.dnsprimary google.co.uk blocked_domains.dnsYou can now save the the file. However as the file is only read on the startup of the DNS service you will need to restart the DNS Server service within the server manager. Once this has been restarted the added domains will now be within the MS DNS manager as shown below.
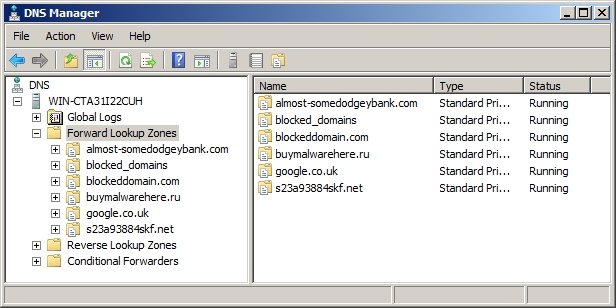
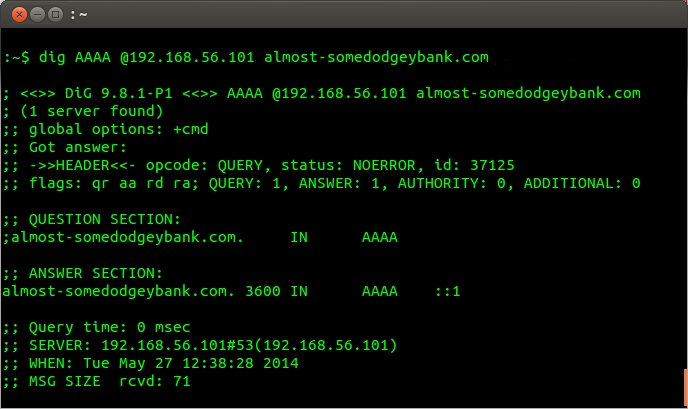
From the queries below the DNS server is now acting as primary for these domains meaning that any queries it receives for these domains instead of looking them up it will respond with it's configuration.

Caveats to blocking domains
There are some easy ways that clients may be able to mitigate these DNS configurations. By modifying their hosts file on their systems to point at the correct IP addresses for the domains or by using a public resolver however both of these methods will require local administrator access.
You should only do this on your internal resolvers, if you take these actions on your public facing authoritative servers then you will be responding to domains which are not your responsibility.
Taking these actions on domains which are secured with DNSSEC will also break the security on them. If validation is turned on then the resolution will fail and the sinkhole will not get contacted.
This guide has been conducted on a system that is not running active directory DNS and there could be some issues experienced within such an environment.


